")
by Tim Reese
At long, long last... If you have been following this blog you have endured both PART 1 and PART 2 of this photography series. You learned how to set up and take the perfect product shot that looks both professional and visually interesting. Now we come upon the end of our journey: the editing process.
Here's the thing about photography. Nothing looks flawless in extreme close up. If you zoom in far enough, you are bound to see flaws, cracks, dust, imperfections, pores, bacteria, tiny creatures, and what have you. Tiny things are gross, and in pictures, they become super noticeable.
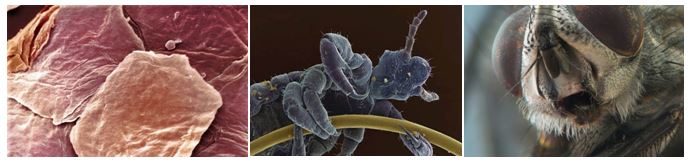
KILL IT WITH FIRE.
That being said, the editing process should not be an effort in false advertising, rather the process should be aimed toward making your photograph a visual representation of what the subject looks like to the human eye. This is a delicate balance and takes years of practice... or you could read this article and become a master in minutes. The choice is yours.
For this example, let's use the ENHANCE GX-M3 Gaming mouse from Accessory Power. 'Cause it's awesome, looks beautiful, and I have a sponsorship quota to fill.
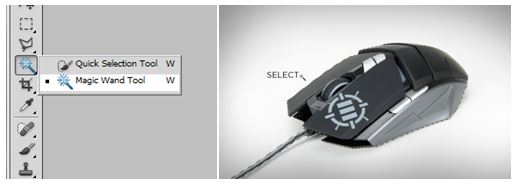
There's two ways to COB an image. Let's start with the easiest way, the magic wand.
The really obvious way of using the magic wand tool is to select the space you don't want and then hit delete. This will technically get rid of the background, but it will also mess you up later in the process and inhibit you from rescaling or modifying the image later. If you're planning on using the magic wand tool for this, you're going to want to go about it in a slightly different way.
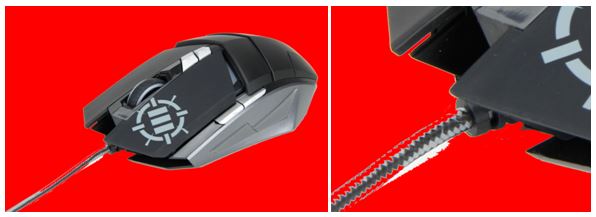
The first step is to duplicate your layer and turn off the visibility of the background layer. This will give you transparency behind your image so you can tell what parts of your background still need to be erased. Now that you've done that, select the background.
Once you have your background selected (you'll know because of all the dotted lines), right click and choose "inverse selection." This selects everything but your background. Once that is selected, create a mask so that only the product is visible.
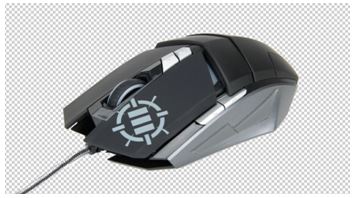
You will be rewarded with lots of squares. So you're done, right? The background is gone and only the product remains. Well... not so fast. That default checkerboard background is a bit deceptive. Let's temporarily replace the background with a bright solid color to see how well this was actually COB'd.
KILL IT WITH FIRE.
Okay so that was far from perfect. The outline is jagged, some of the shadows and highlights overextend into where the background would be, some lighter areas of the product have been deleted, and there's a strange yellow glow around many of the plastic parts. We could go in and fix these by hand, but instead let's go on to our second COB method: The pen tool.
The pen tool is more work, but it gives you a lot more control, which in this case is worth the extra trouble. Basically what you'll be doing is outlining the product by hand using a series of points and curves. Being able to do this quickly takes practice, but once you've traced a few images you'll be able to COB effortlessly in no time.
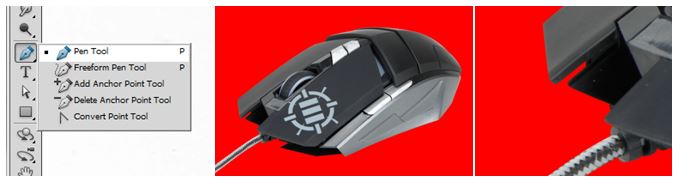
This is a much cleaner option and allows you to have complete control over what background elements you see in your final image.
This process also takes some work, but basically what you're going to be doing is cleaning up any loose edges, hairs, dust specks, or inconsistencies. Simply go over each set of pixels with the healing brush until the surfaces look clean and solid. If this isn't giving you the results you want, use the stamp tool and replace an area with a similar area in another part of the image. I also did some color correction to the image so that the mouse reflected the colors of its real-world counterpart. This entire step is a fine balance, so take your time and experiment with what you want it to look like.
Did I make that all sound really easy? Great! Moving on.
Again, this part is a little more art than science (you work in the art department after all) so use your best judgment.
I like to paint layers on using the brush tool and then converting that layer to the "Overlay" setting. Be sure to paint not only the source of the light, but also any surface that might reflect light onto it.
Well there you go. We've been through all the steps of taking beautiful product photography. Thusly, we have reached the very end of our long, drawn out, trilogy of blog tutorials. Now go and take some pictures, dang it.
At long, long last... If you have been following this blog you have endured both PART 1 and PART 2 of this photography series. You learned how to set up and take the perfect product shot that looks both professional and visually interesting. Now we come upon the end of our journey: the editing process.
Here's the thing about photography. Nothing looks flawless in extreme close up. If you zoom in far enough, you are bound to see flaws, cracks, dust, imperfections, pores, bacteria, tiny creatures, and what have you. Tiny things are gross, and in pictures, they become super noticeable.
KILL IT WITH FIRE.
That being said, the editing process should not be an effort in false advertising, rather the process should be aimed toward making your photograph a visual representation of what the subject looks like to the human eye. This is a delicate balance and takes years of practice... or you could read this article and become a master in minutes. The choice is yours.
1. Cutting out the background
Cutting out the background (or COB in the industry) is the process of eliminating any surrounding environment from your photo. Most photo editing software has a way of doing this, but for this example I'm going to be using the pen tool and the magic wand tool in Adobe Photoshop.For this example, let's use the ENHANCE GX-M3 Gaming mouse from Accessory Power. 'Cause it's awesome, looks beautiful, and I have a sponsorship quota to fill.
There's two ways to COB an image. Let's start with the easiest way, the magic wand.
The really obvious way of using the magic wand tool is to select the space you don't want and then hit delete. This will technically get rid of the background, but it will also mess you up later in the process and inhibit you from rescaling or modifying the image later. If you're planning on using the magic wand tool for this, you're going to want to go about it in a slightly different way.
The first step is to duplicate your layer and turn off the visibility of the background layer. This will give you transparency behind your image so you can tell what parts of your background still need to be erased. Now that you've done that, select the background.
Once you have your background selected (you'll know because of all the dotted lines), right click and choose "inverse selection." This selects everything but your background. Once that is selected, create a mask so that only the product is visible.
You will be rewarded with lots of squares. So you're done, right? The background is gone and only the product remains. Well... not so fast. That default checkerboard background is a bit deceptive. Let's temporarily replace the background with a bright solid color to see how well this was actually COB'd.
KILL IT WITH FIRE.
Okay so that was far from perfect. The outline is jagged, some of the shadows and highlights overextend into where the background would be, some lighter areas of the product have been deleted, and there's a strange yellow glow around many of the plastic parts. We could go in and fix these by hand, but instead let's go on to our second COB method: The pen tool.
The pen tool is more work, but it gives you a lot more control, which in this case is worth the extra trouble. Basically what you'll be doing is outlining the product by hand using a series of points and curves. Being able to do this quickly takes practice, but once you've traced a few images you'll be able to COB effortlessly in no time.
This is a much cleaner option and allows you to have complete control over what background elements you see in your final image.
2. Cleaning and enhancing.
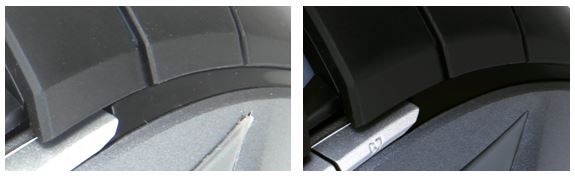
You know what I said earlier about imperfections becoming really obvious when you zoom in really close? This next step is what remedies that. There are multiple ways to go about removing imperfections such as dust, smudges, scratches or blemishes, but the two main tools that we'll be using are the Stamp Tool and the Band-Aid/Heal tool.This process also takes some work, but basically what you're going to be doing is cleaning up any loose edges, hairs, dust specks, or inconsistencies. Simply go over each set of pixels with the healing brush until the surfaces look clean and solid. If this isn't giving you the results you want, use the stamp tool and replace an area with a similar area in another part of the image. I also did some color correction to the image so that the mouse reflected the colors of its real-world counterpart. This entire step is a fine balance, so take your time and experiment with what you want it to look like.
Did I make that all sound really easy? Great! Moving on.
3. Let it Glow.
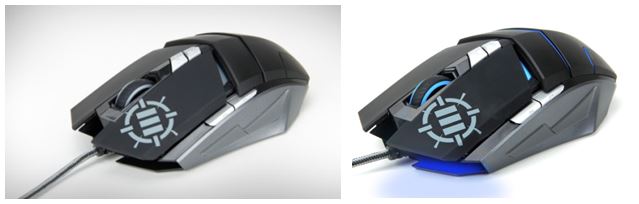
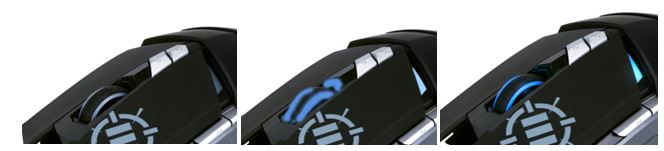
Here's the thing about using bright lights for photography, it tends to overpower the lights on a product. This product, for instance, has sleek LEDs and glows in multiple colors. Unfortunately, we can't see that in the pictures we took because of the flash. Because of this, we're going to have to add those now.Again, this part is a little more art than science (you work in the art department after all) so use your best judgment.
I like to paint layers on using the brush tool and then converting that layer to the "Overlay" setting. Be sure to paint not only the source of the light, but also any surface that might reflect light onto it.
Well there you go. We've been through all the steps of taking beautiful product photography. Thusly, we have reached the very end of our long, drawn out, trilogy of blog tutorials. Now go and take some pictures, dang it.