by Tim Reese
So you’re a photographer, huh? That’s not a surprise, everyone is nowadays. Phones are being equipped with more and more advanced cameras every day. (Not mine, because my phone is a potato, but most phones.) Whereas historically there was a time when getting a portrait taken was something you did maybe once in your life, now it’s hard to decide which was the cutest selfie you took today (hint: it’s the third one.) So with photography going from a luxury to an almost universally shared hobby, what does it take to become an actual professional photographer? Well the short answer is… find out what kind of pictures make money, and find out how to create them.I’m one of the in-house photographers at Accessory Power, a company that brings in more than 50 new tech accessories a year. Each of those products needs to be photographed with incredible attention to detail, just in case one of them ends up on a fifteen foot tall billboard. Hopefully the following tips and tricks will help you take the perfect shot whether you are applying for photography jobs, looking to improve your prowess, or just want to make the cat-shaped-toaster you’re selling on ebay to look awesome.
1. Know the strengths of your subject.
In most free-reign photography, choosing what you want to take a picture of is usually the first step, but in commercial photography the subject of the photo will almost definitely be decided for you. Let’s begin a hypothetical situation where you are a new professional photographer at AP. Ready? You are handed a small plastic and metal device that you’ve never seen before and all you know is you have to make it look amazing. Your first job is to figure out what makes the product special- essentially you get to play with toys for a little bit. Once you’ve played with the gadget, plot out exactly what makes it spectacular and decide on the best way to highlight its features. The better you know your subject, the more interesting photos you can add to your collection, and the more likely those photos will peak someone’s interest (when browsing for cat-shaped-toasters)
2. The Setup.
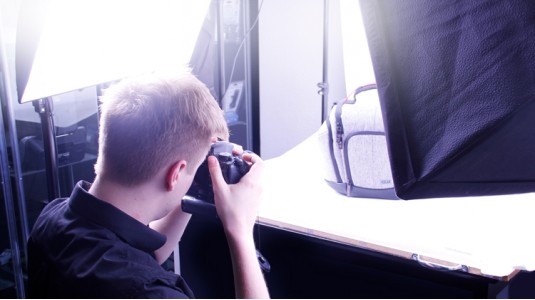
You don’t need to have an extraordinarily large budget to make photos that are worth a thousand words. Simplicity is key here. I like to use a three point lighting setup, one light in the front to my Left, one light to the Right, and a toplight/backlight to visually separate the subject from the background. In order to get the clean white background that you see in product shots, we use a large roll of white paper hung from a stand at the back of the room and draped over a table. Accounting for flash, I set my ISO to 100, with a 1/125 shutter speed, and an f-stop anywhere from f8-f12.3. Storyboard.
In professional product photography, you might not always know what each of the photos is being used for, you need to make sure you get a picture of everything you could possibly need. I like to talk to whoever is in charge of advertizing or development for the product in order to really get a feel for what they’re looking to highlight. After they discuss, I draw out a number of sketches of potential camera angles and looks for the product and prepare to shoot… but that’s a whole different project.… Oh you thought we were going to talk about actually photographing things today? Patience, grasshopper; we’ll get there. Stop by next week when we’ll be talking about actually taking the best corporate photos and what all those darn buzzwords mean.
